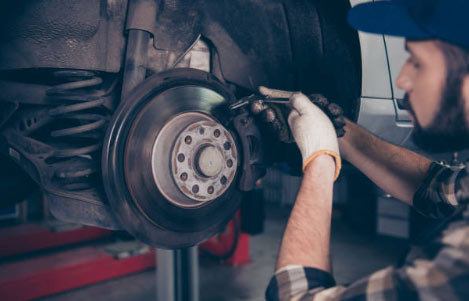
Have you noticed a screeching noise or does your car pull to one side when you press the brake pedal? Or are your brakes not performing properly? If so, there’s a good chance that your brake pads need to be changed. (See the Champion Trouble Tracer to see a full overview of potential brake pad problems)
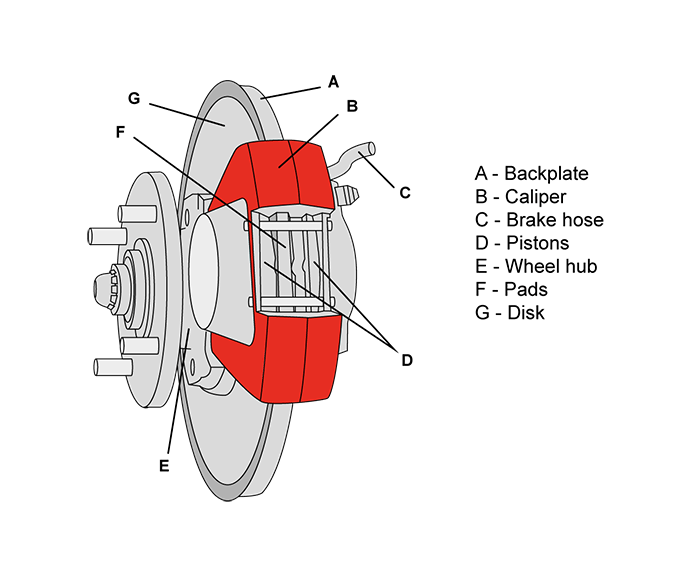
Your brakes work by the brake pads pressing against the brake disc, causing friction and slowing or stopping your car. Over time, friction material on the brake pad wears over time until only the back plate remains. As well as the screeching noise, stopping power is reduced, potentially endangering the lives of you, your passengers and other road users.
As a rule of thumb, brake pads last 30,000 to 60,000 km, depending on road conditions, the quality of the brake pad and disc, and your driving style.
Getting started
Before you get started, it’s a good idea to prepare the tools you’ll need for this job. This is likely to include:
Tools:
- Cordless drill
- Socket / ratchet set
- 4-in-1 screwdriver
- C-clamps
- Vinyl tubing
- Anti-rattle clips
- Blue and red thread locker
- Glass jar
- Mechanic’s wire
- Nickle anti-seize
- Polishing pads
- Jacks and jack stands
- Lug nut tyre tool
- Pry bar
Supplies
- Rags
- Wire brush
- Aerosol brake cleaner
- Owner’s manual
And, of course, don’t forget the replacement brake pads. There are a wide range of different brake pads available on the market. In general, quality and lifespan is reflected in the purchase price.
Useful tips and tricks
Make the job a little easier with these useful tips and tricks:
- Work on one side at a time
Brakes can be complex, with springs and clips that need to go back in exactly the same position. By leaving one brake untouched as you work on its pair, you have a reference at hand in case you want to check something. - Replace brake pads in pairs
Experts recommend that you change brake pads in pairs, in other words, both the front brake pads or both the rear brake pads. This will ensure your braking is even on both sides of the car. - Hex- or star-shaped sockets?
The caliper bolts in some brake systems have a hex- or star-shaped head. Before you get started, turn the front wheels to one side and then check out the caliper bolts using a flashlight. You can then see if you need to buy (or borrow) specific sockets for the job. - Avoid leaking brake fluid
If your brake fluid was topped up when the brake pads were worn, there’s a chance there will be too much fluid in the system for the new, thicker brake pads, which could cause leaks. You can drain brake fluid from the reservoir using a vacuum pump or a turkey baster. Alternatively, place some rags under the master cylinder to catch minor spills.
Disassembling your brake
 Remove the wheels
On a level surface, loosen the lug nuts without removing them and jack your car up. Place the jack stands under a solid part of the car’s frame, check your owner’s manual if you are in any doubt of the best place to put the jack stands. When your car is safely resting on the jack stands, finish unscrewing the lug nuts and remove the wheel from the car.
For safety, place wooden blocks behind your rear wheels and put the removed wheels behind the jack stands.- Unbolt and remove the caliper
Loosen the caliper bolts and the caliper bleeder screw. Lightly reseat the caliper bleeder screw. Remove the caliper bolts and slide the caliper off the brake disc to set it on the caliper bracket. Be careful that you don’t put any strain on the brake line, as a broken brake line is more complicated to replace. - Remove the old brake pads
You can now see the old brake pads. Remove any clips, anti-rattle springs or anti-squeal shims and then remove the old brake pads with a light hammer tap. - Clean your brake
Prevent future corrosion and potential problems, including brake noise and harsh braking, by cleaning your brake system. Dust the caliper sliding area with a wire brush and spray brake cleaner and coat the area with a light covering of brake grease, make sure no brake grease touches the brake disc or the new brake pads as this will reduce the effectiveness of your brakes.
Clean the caliper bolts with aerosol brake cleaner and check for corrosion, replace if necessary. Then, clean all the rust and debris from the wheel hub with a mildly abrasive polishing pad. Lastly, use aerosol brake cleaner on the brake disc to remove any rust.
Replacing your brake pads
- Retract the pistons
After the old brake pads have been removed, the pistons are visible. Compress it into the caliper. If your brake has two pistons, they need to be compressed simultaneously. - Watch out for brake fluid leakage
Retracting the pistons can cause brake fluid to leak back into the master cylinder’s reservoir. Check the reservoir after you have finished the first wheel. If you think the reservoir will be too full, remove some fluid. - Insert the new brake pads
Attach the new brake pads in exactly the same way as the old ones. This means matching any notches on the brake pads, and using the necessary springs and clips. If you’re uncertain what is needed, check your reference wheel.
Reassembling your brake
- Replace the brake caliper assembly
When the new brake pads are in position, rotate the caliper back into position. It might take some jostling to make the caliper fit over the new, thicker brake pads. Once it is in position, reinsert the bolts and tighten them. If you have a brake sensor, reconnect it now. - Repeat for the other wheel
After you have finished the first wheel, you need to start on the wheel on the other side. This has been used as a reference up to now, so first check that everything has been done correctly on the first wheel before disassembling the second one. - Reattach the wheel
Replace the wheel and tighten the lug nuts (hand tight). Then lower the vehicle until the wheel touches the ground. Use a torque wrench to tighten the lug nuts in a star pattern. Check your owner’s manual for the correct torque specifications for your make and model. - Test your brakes
- Bed your brakes in
Pump your brake pedal a few times to rebuild pressure on your brakes. When you feel pressure, move forward slowly and gently try your brakes. Test your brakes when driving both forward and backward slowly, and then go for a drive. Try and avoid heavy braking for the first 20-30 km. If you hear any squeaking or scraping, take another look at your brakes to ensure everything is securely in place.
Remember your brakes need to be bedded-in. This means, don’t press too hard on them for the first 200km or so.
Want to see a brake pad being installed? Check out this useful Champion video.
The content contained in this article is for entertainment and informational purposes only and should not be used in lieu of seeking professional advice from a certified technician or mechanic. We encourage you to consult with a certified technician or mechanic if you have specific questions or concerns relating to any of the topics covered herein. Under no circumstances will we be liable for any loss or damage caused by your reliance on any content.
